Food is one of my greatest loves in life. Trying new cuisines is one of the absolute best parts about traveling, and great food can easily be the highlight of a trip. When I was 18, I went to England with my dad to see my beloved Manchester United play in Manchester. While in London visiting family en route, we braved the crowds and went to Portobello Market. Portobello Market can be a bit tourist trap, but as my dad actually used to live down Portobello Road and as I’ve already revealed, I adore markets, there we were.
Despite the crowds and number of gimmicky tourist shops, I highly recommend taking a trip to Portobello Market. There are some gems to be found, and my dad and I sure did stumble upon one. Along the road is a food stall that sells Ghanaian stews that are absolute to die for. Life changing. So life changing, in fact, that when I moved to London the first time, I couldn’t stop talking about them, and when I moved to London the second time, I STILL couldn’t stop talking about them. In fact, I was salivating over these stews while reminiscing with my dad just a few weeks ago. Needless to say, excellent food makes a big impression on me.
Another one of my favorite things to do, stemming from my love of exploring other cultures, and of course, food in general, is trying out recipes for foods I’ve encountered on my travels. My recent conquest has been French baguette. Freshly baked bread is ingrained (pun intended) in French culture, and there’s nothing quite like breaking into a piece of warm, chewy yet crusty piece of baguette, topped with pats of warm runny butter. I’m salivating again.
As you know, #taxpocalypse cancelled my trip to Paris, so playing with this recipe has been an especially nice, albeit not comparable, substitute for actually eating it at a boulangerie in France. I’ve also been diligently learning French the past year (more on that in an upcoming post). The French lessons day in and day out have had the side consequence of putting me in a major Francophile phase. Unsurprisingly, I’ve gotten a lot of enjoyment in working with this French baguette recipe, and making a couple loaves for the week on a Sunday afternoon has become a nice weekend ritual.
The recipe I’m sharing with you all is the result of stalking numerous online recipes, and multiple rounds of my own experiments and tweaks. It makes two generous loaves. It’s not particularly labor intensive, but because it rises twice, you need to set aside about 3 hours to be in the house keeping an eye on it.
Ingredients:
- 2 heaping cups of flour
- salt
- 1.5 cups warm water
- 1/2 packet of fast acting yeast
(For serious, that’s it). Preservative free and way better than the store bought stuff on so many levels (including price!!! #budgetwin)
Method:
1. Mix the flour, yeast, and salt into the mixing bowl. For salt, I usually use a couple generous pinches.
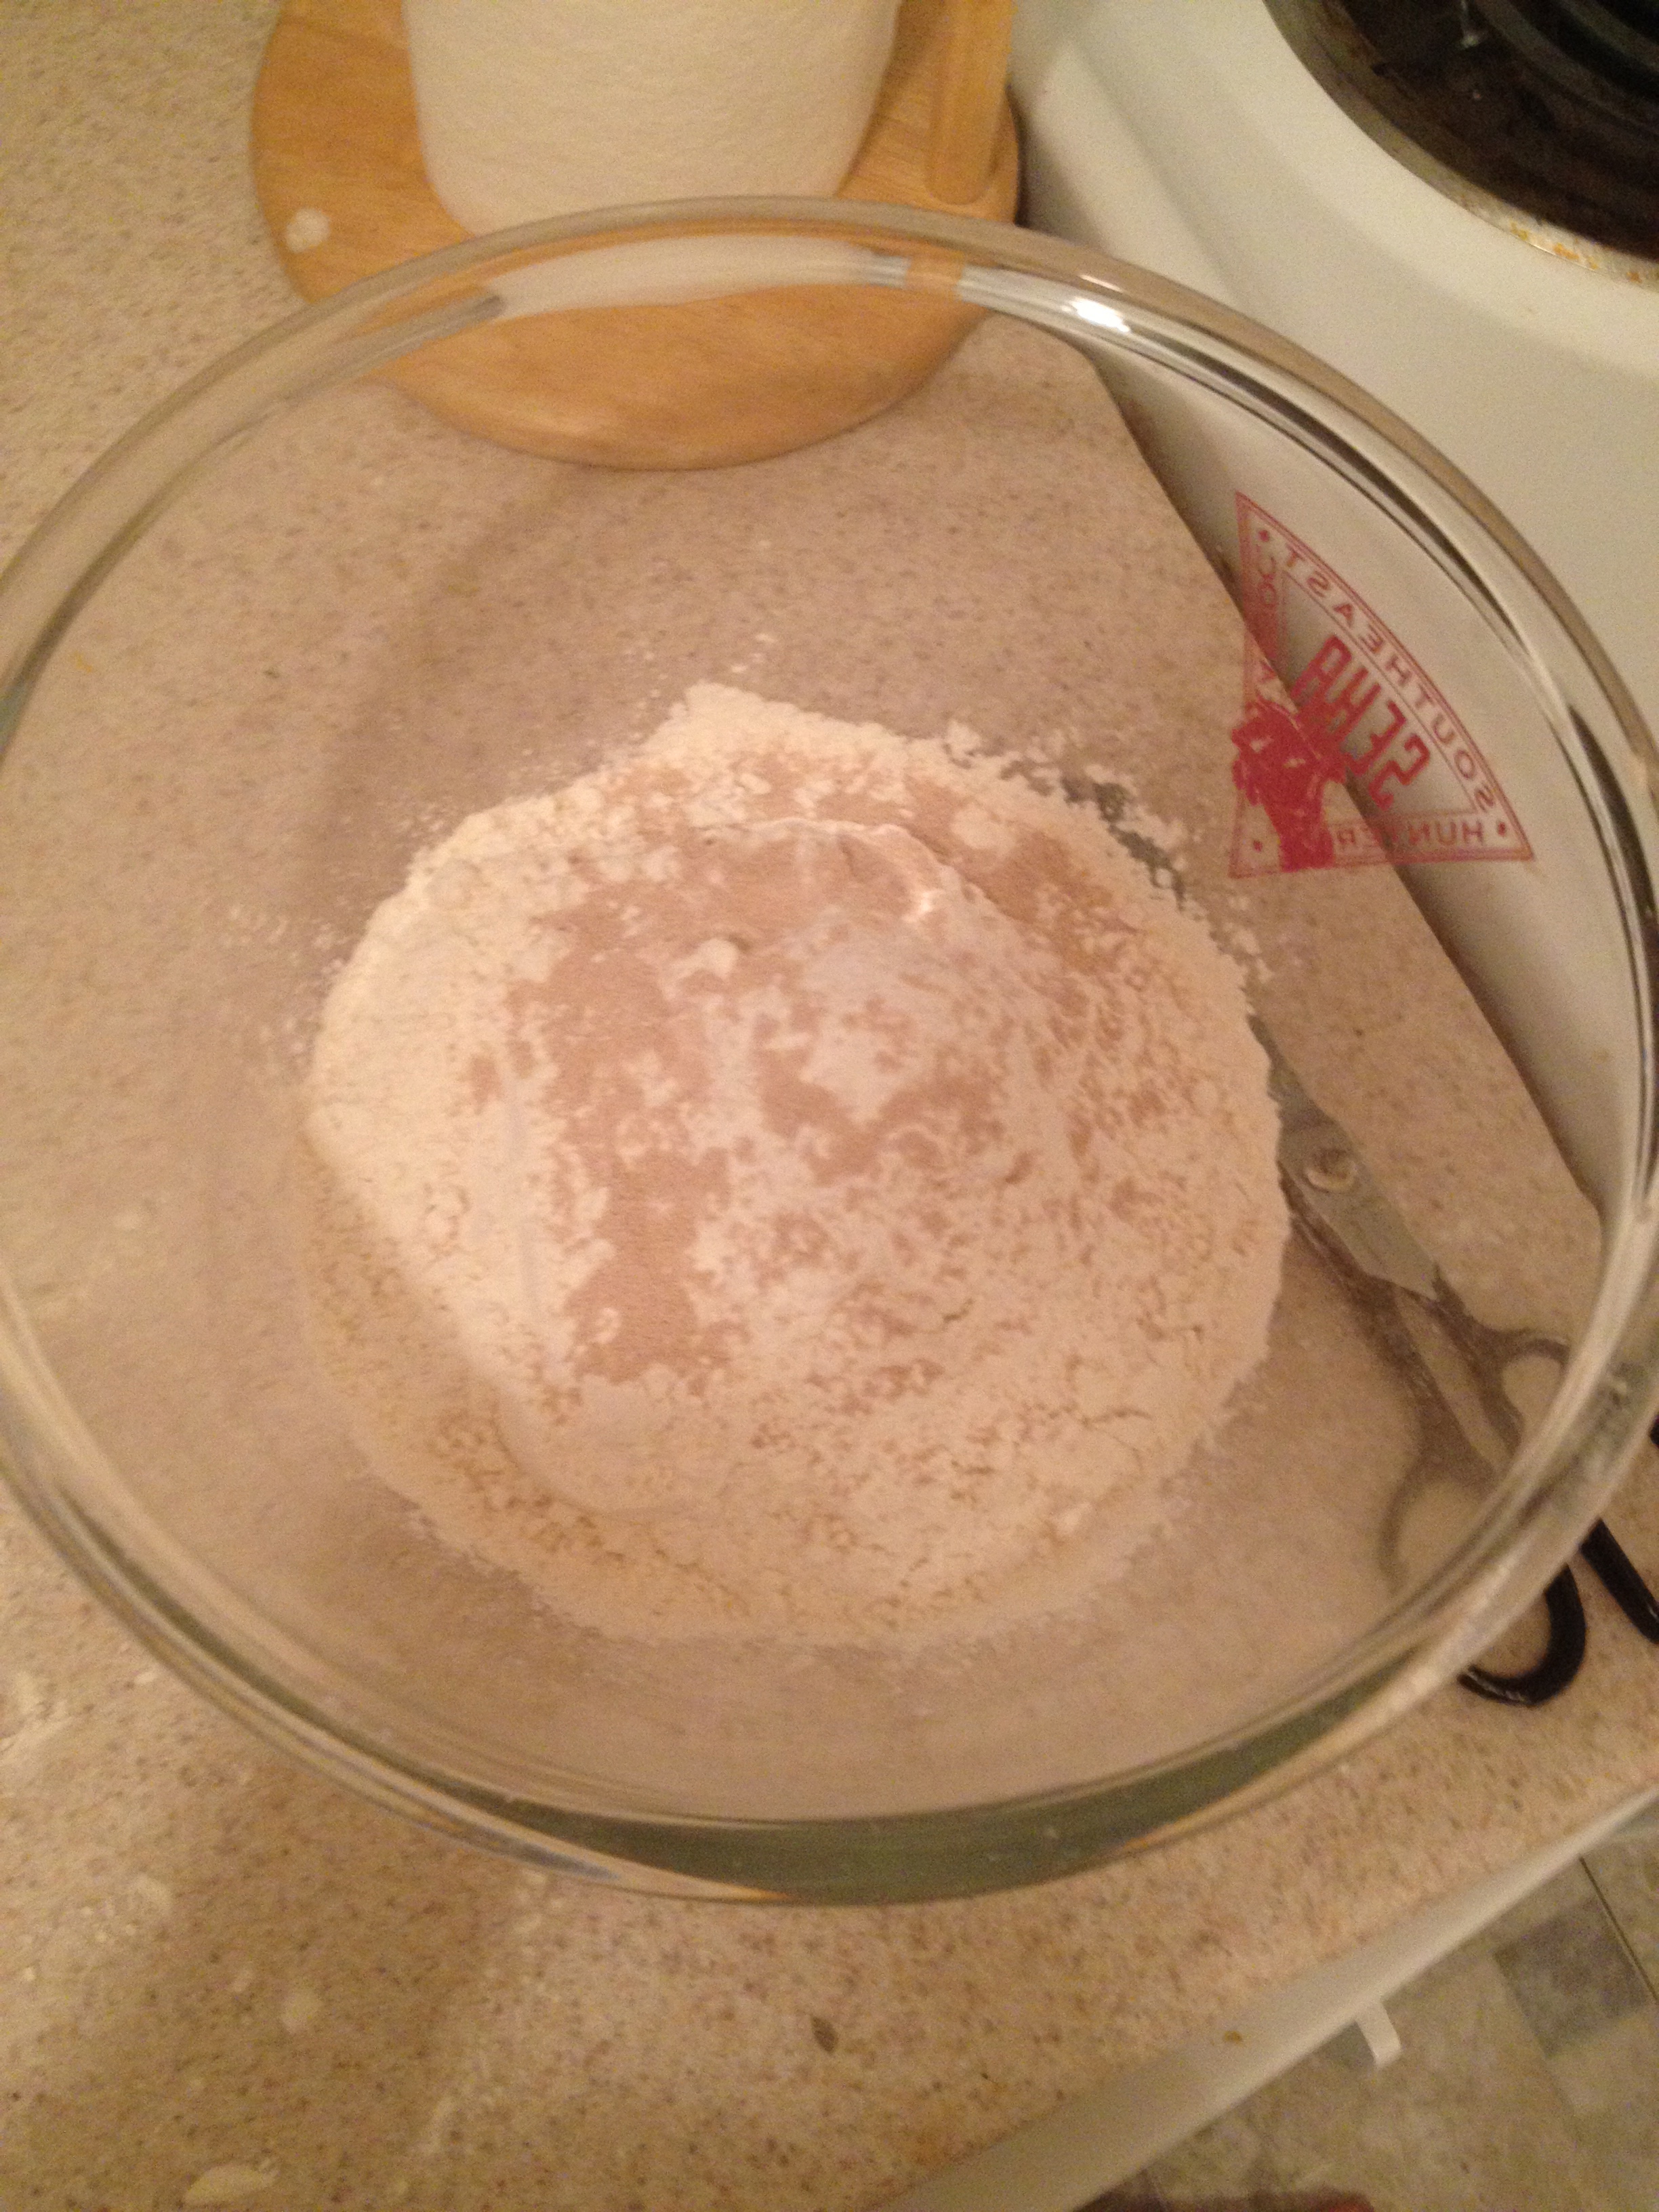
2. Create a small well and pour the water in slowly, folding it in with your hands.

3. Roughly mix together with your hands. The dough ball will be quite sticky, but that’s ok.

4. Lightly flour your kitchen table, counter, whatever you’re using for your cooking surface, and start kneading the dough. You’ll need to do this, pushing and pulling, back and forth, for about 10 minutes. If the dough is still insanely sticky, add a little bit of flour. The objective is to get the dough smooth but also elasticy. The kneading is a super important process because in doing so you are activating the gluten and creating air pockets, all necessary to make your bread the right texture and consistency.

5. Plop the dough ball back into your bowl. Cover bowl with a clean cloth and leave to rise in a warm, dry place for about an hour. This is a crucial phase so don’t be impatient! It really does need the full hour. When you uncover it, the dough ball should be about double its original size. What I like to do sometimes is turn on the broiler for a couple minutes, open the oven door, turn the broiler off, and let the covered bowl sit on top of the stove just by the oven opening. Voila! A warm, dry place.

6. Oopsie, I got too involved in the therapeutic process of bread-baking and completely forgot to take a picture of this phase! Read carefully, and I will try to be as explicit as possible. Cut your now inflated dough ball in half, so there are now two smaller dough balls. Spread the first ball into as large a rectangle you can manage, gently, using your fingers. It doesn’t need to be perfect. Next, fold in either side of the rectangle in half, the long ways, as if you were closing the doors of a cupboard. The two edges should meet in the middle. Then fold it in half again the long way, and press the edge together gently with your fingers. Repeat for the second ball of dough. Still with me? Good.
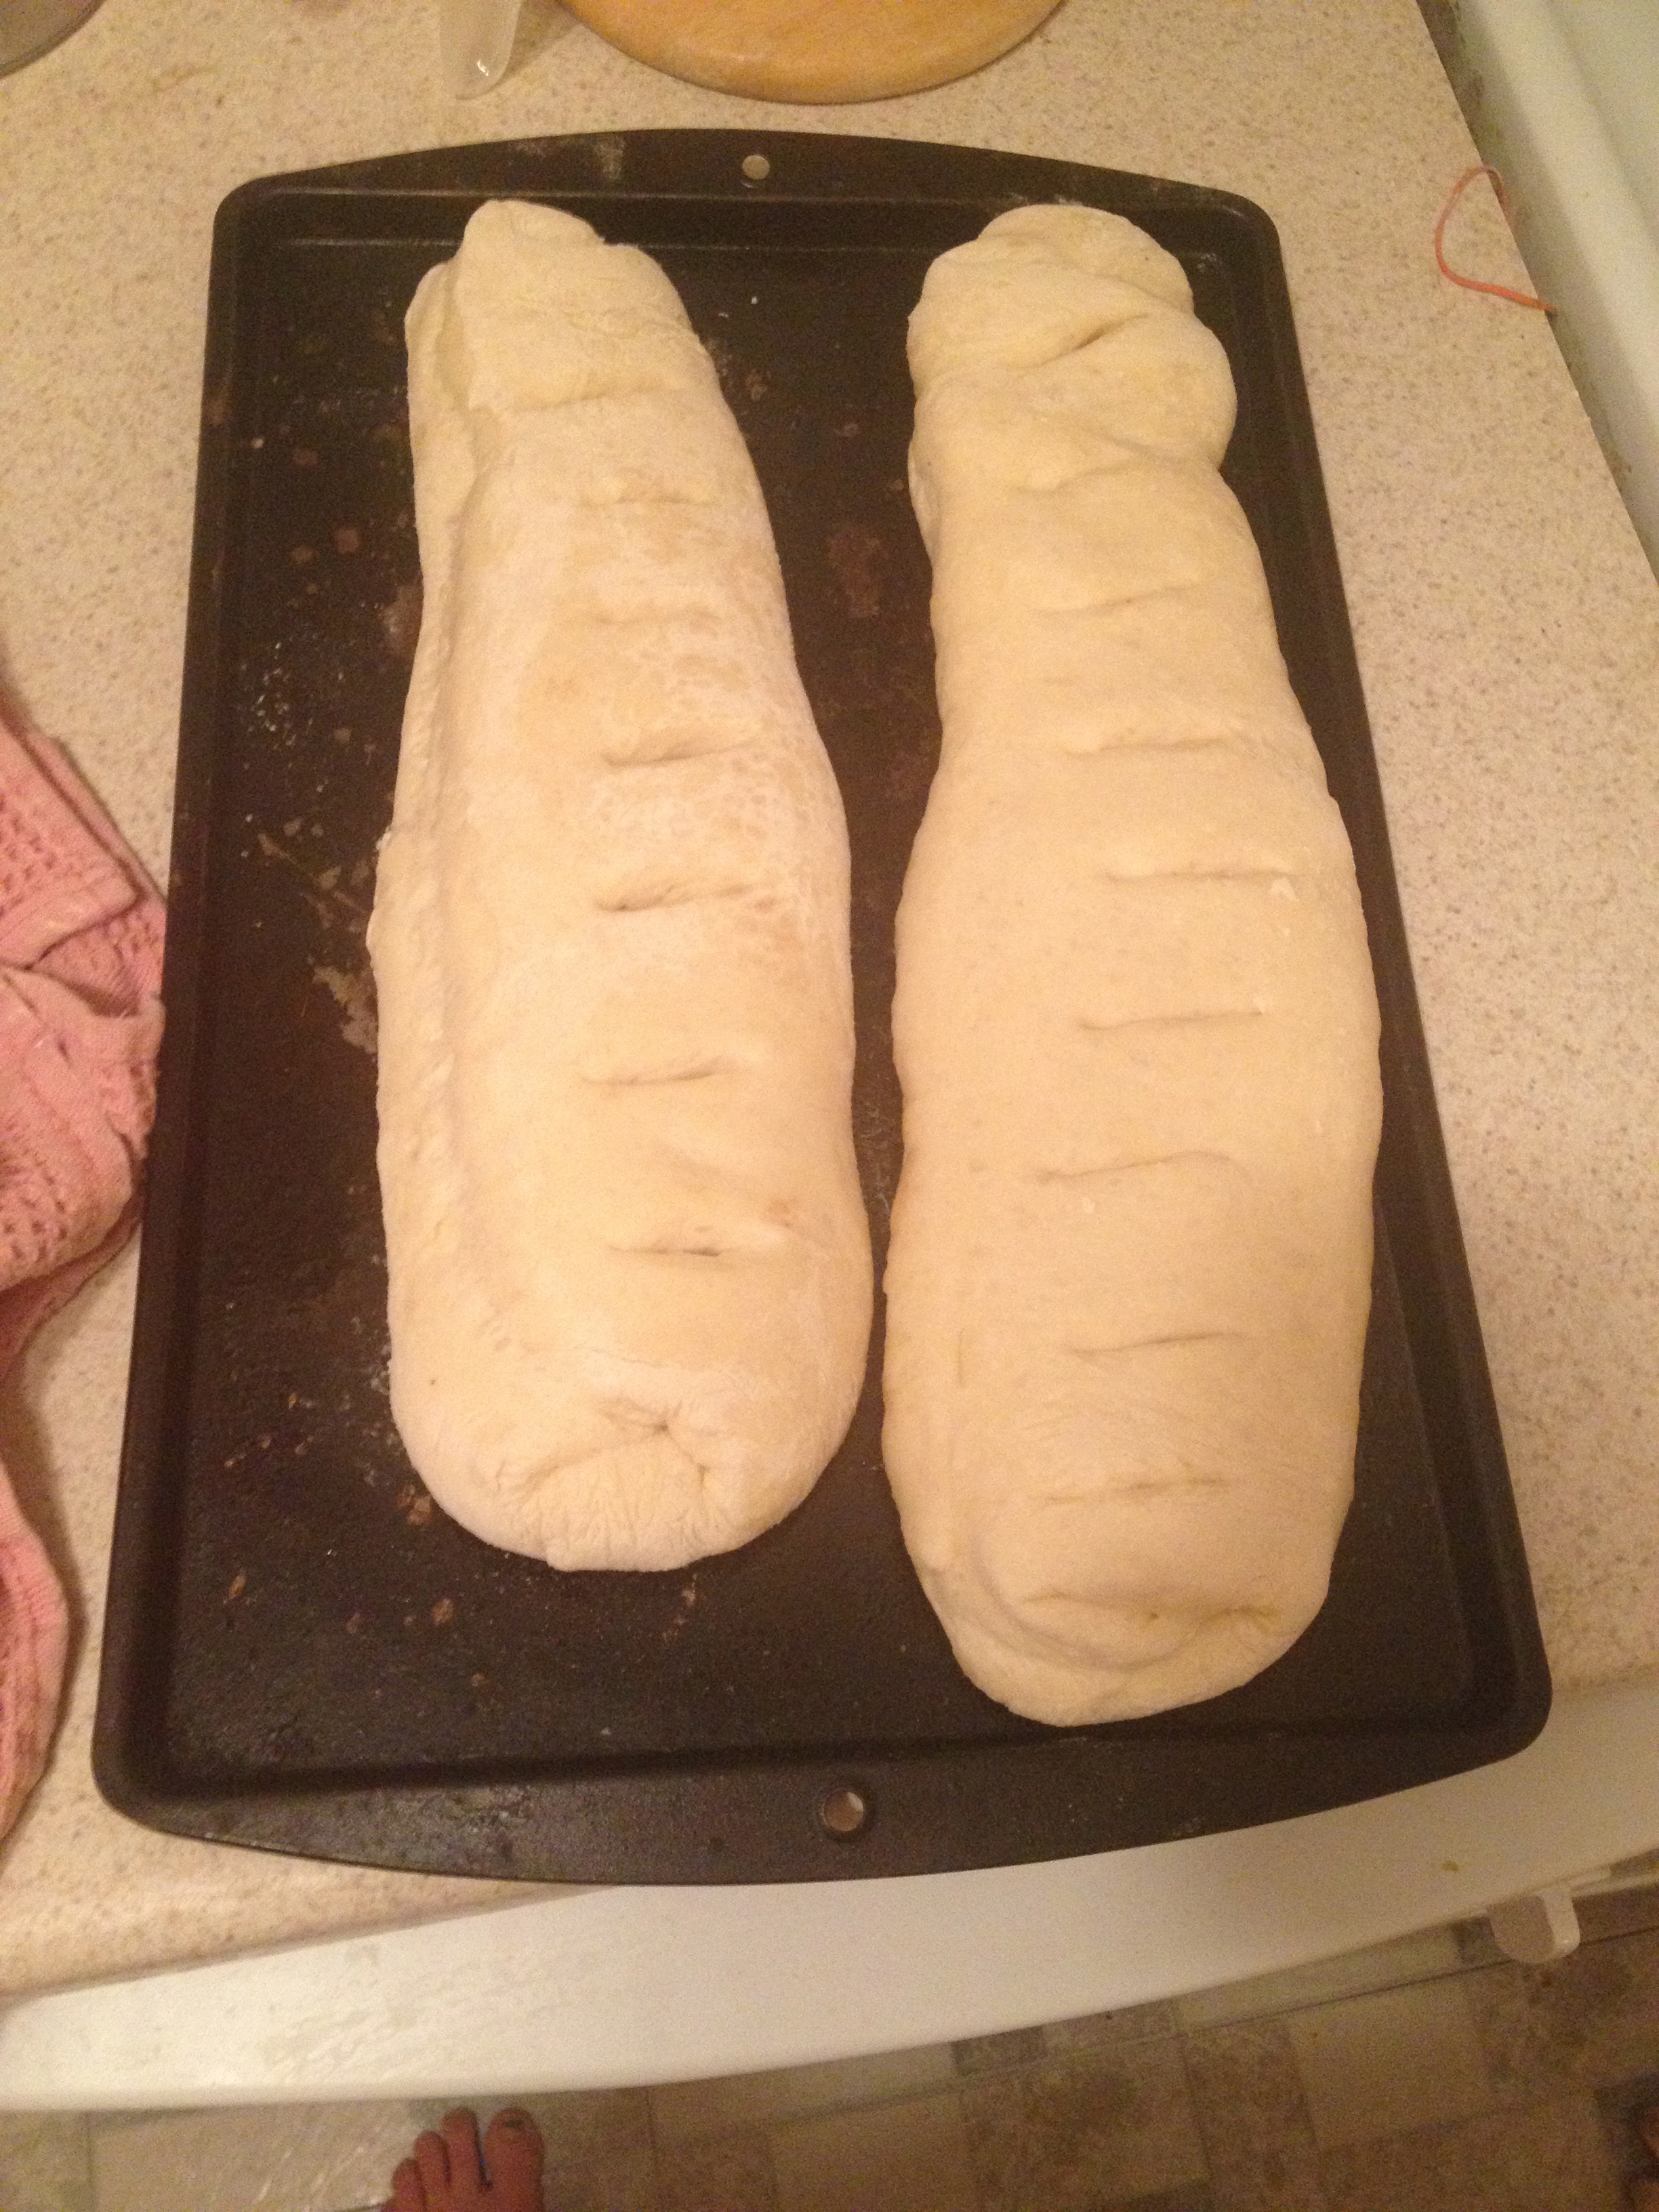
7. Lay both baguettes on a greased baking tray. They should be scrawny looking, and will stretch in length a little when you pick them up and transfer them to the tray. Use cooking scissors (or any old scissors, as long as they’re clean) and snip 6-7 diagonal slits across the top of the baguettes. You can see at the ends of the baguette in the picture below, a little peek of the layers we created by our fancy wardrobe folding procedure.

8. Cover the baguettes with your cloth again and let rise for another hour. Make sure the cloth falls in between the two loaves, because trust me, they will go Frankenstein on you and morph together if you don’t separate them. Use the broiler method again to create the warm, dry space.

When the loafs have risen, they should look like this, aka massive. Don’t worry about them being lumpy and irregular, it’s totally fine.
9. Preheat your oven to 450 degrees Fahrenheit. Bake for 15-20 minutes. This will depend on your oven, altitude, black magic, but basically you want them in there until they’re golden brown and beautiful looking.
LIKE THIS. BOOM.

There is literally steam curling out of the bread in this photo, but the camera didn’t really do it justice. Et c’est fini! Enjoy just as it is, with a bit of butter, cheese, or jam, as the base of a really bomb sandwich, there are lots of possibilities.
Heureux cuisson mes amis! -xo

Fun! I’m going to make this asap!
LikeLiked by 2 people
We love the baguette here too !!
LikeLiked by 1 person